Blurring the background in Lightroom is a bit of fakery. But, done well it can enhance your photo compositions. It is almost always better to create the depth of field effect you are after at the time of the shooting. We know that doesn't happen every time. So, this is the next best option. Assess your image Choose a Blur Method You can blur a background in Lightroom using any one or more of these 3 tools: Brushes Radial Gradient Linear Gradient Depending on the option you choose, first click on the Masks icon in the toolbar just below the histogram in Lightroom. Next, choose which option you want to use to apply blur to the image. Step 2. 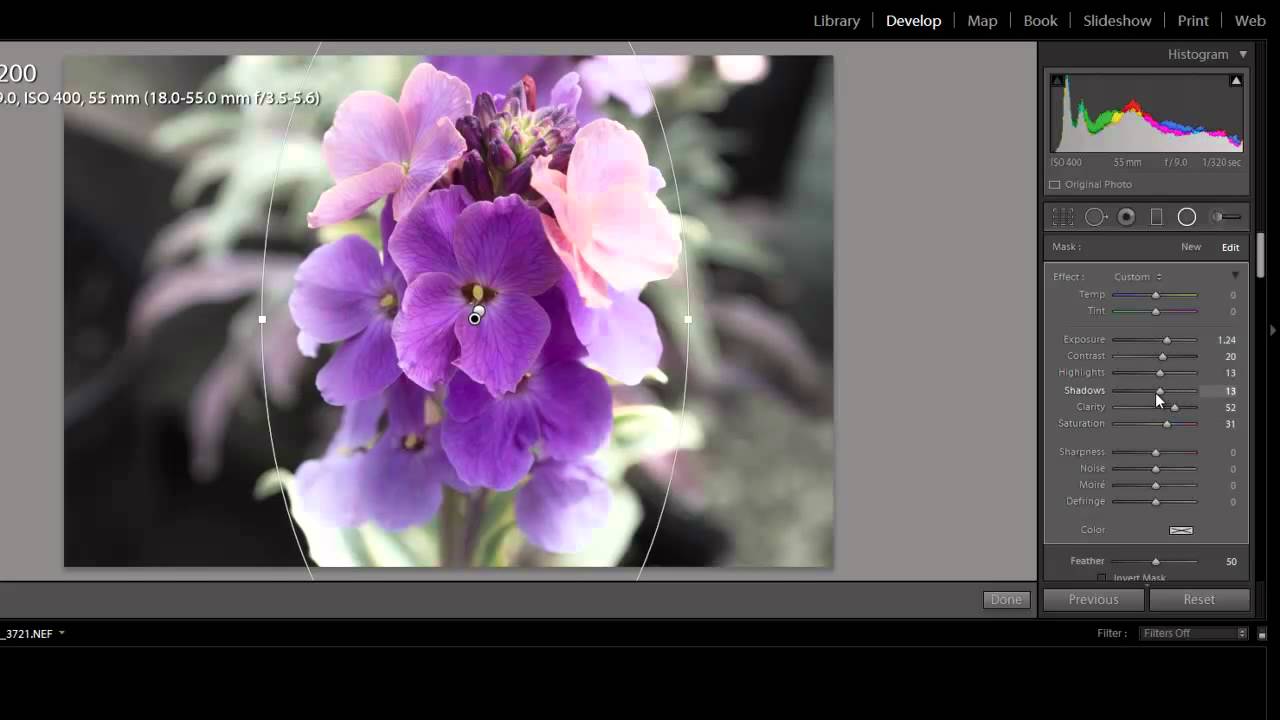
How to Blur Background Using Lightroom Your Ultimate 2020 Guide
Adobe Lightroom Basics: In this tutorial I'll show you how to blur the background in Adobe Lightroom.Image used: https://unsplash.com/photos/XJrSwuM8Tsg-----. How to Blur out the background Lightroom CC - Step by Step Step 1: Import Your Photo Step 2: Create a Mask That Only Affects the Background First Mask Option: the Adjustment Brush tool Second Masking Option: the Radial Filter Third Option: The Graduated Filter Step 3: Decrease Texture, Sharpness and Clarity Step 1: Import Your Photo
Step Three: Apply the Blur effect Once you're done painting, uncheck "show selected mask overlay" and you will be able to see the changes on the image as you adjust the parameters in the right panel. The two areas we will be adjusting are sharpness and clarity. If you prefer to set your subject apart from the background and create a beautiful blur, you want to minimize the DOF. Use small f-numbers (aperture), longer focal length, and set up closer to your subject. Using Adobe Lightroom Background Blur to Improve Photos. Lightroom is a beginner-friendly option for managing and lightly editing photos. 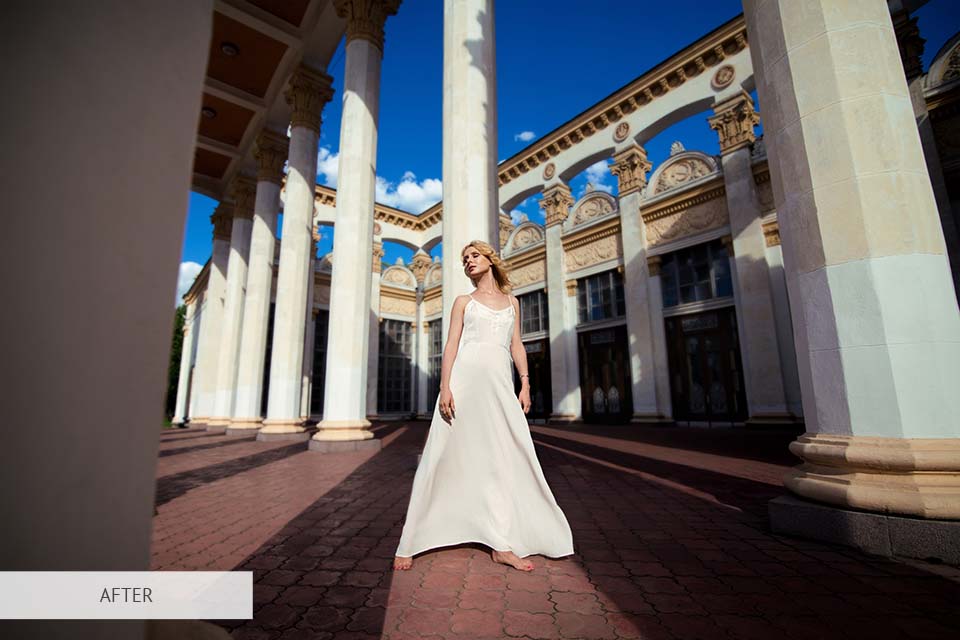
How to Blur Background in Lightroom in 6 Easy Steps Bonus Freebies
Step 1: We're going to blur the entire background of the above image, using a mask. Create the mask and turn of the Auto Mask setting by unchecking it. Step 2: Press O on your keyboard so that you can see the mask as you're applying it. Brush around the subject with your adjustment brush until the entire background is masked. Here's how to blur the background via the radial filter: Launch the Lightroom app. Load the image you want to edit. Select the radial filter from the menu. It looks like a translucent red circle. Position it on the photo. Make sure it covers the object or a person you would like to keep in focus. Resize and reshape the filter as necessary.
The blurred background effect is a popular trick used in photo editing to highlight and make the portrait stand out from the background. This effect is widely used in fashion and wedding photography. It works best for portraits as it makes portraits pop from the background. The best way to blur a background is to set your camera controls and your subject location as you are taking photos. Using a wide aperture setting, a lower f-stop number will help you blur the background in your photos. The wider the aperture you choose, the shallower the depth of field is. 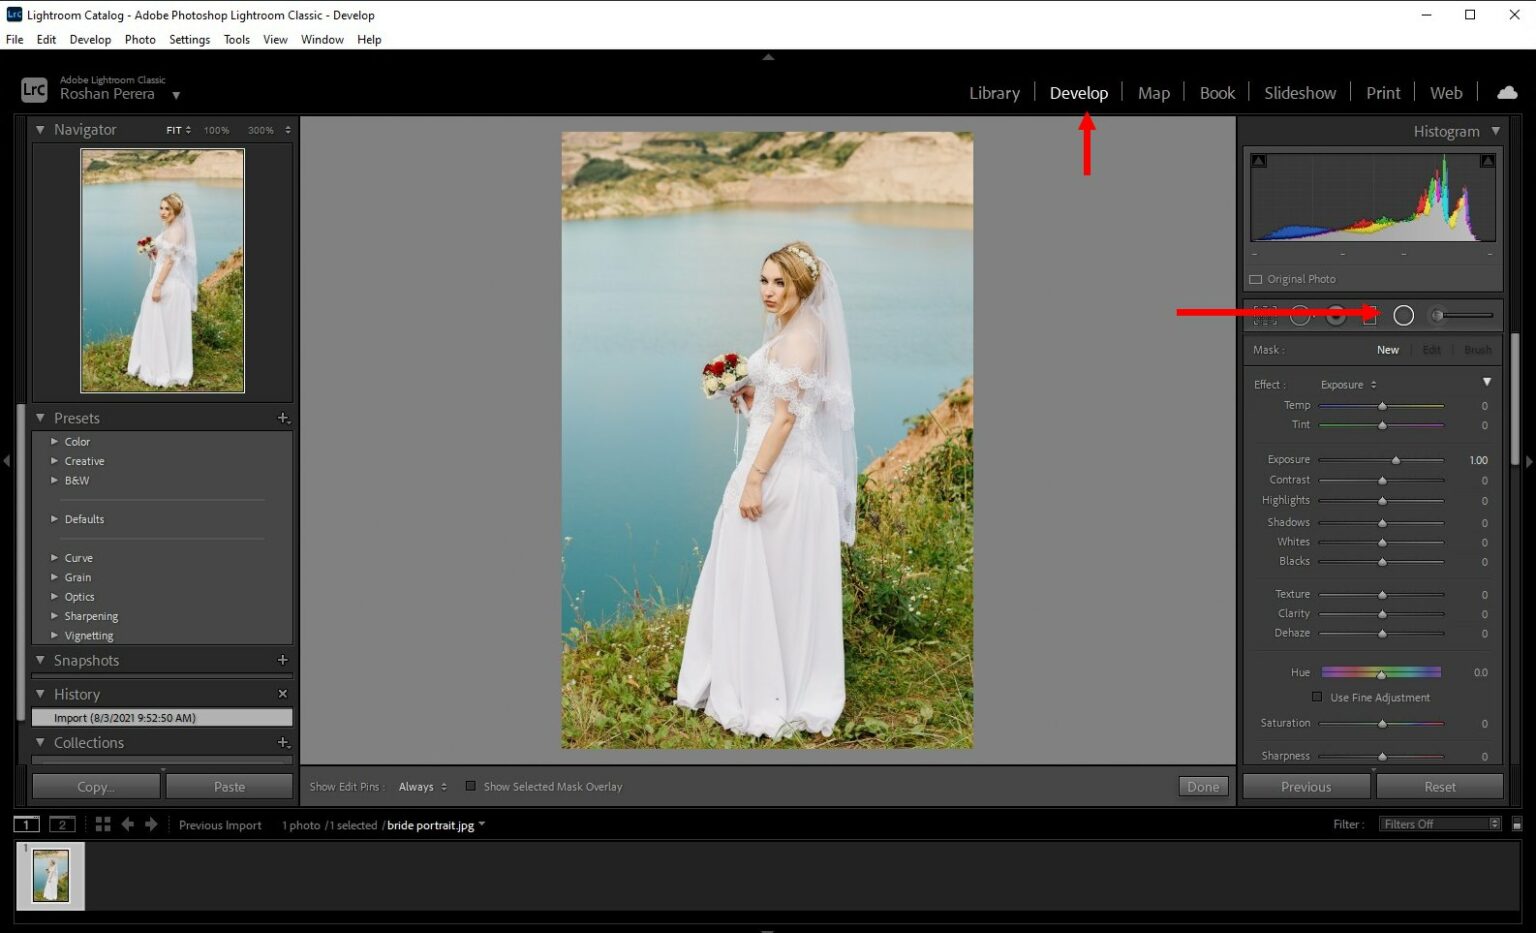
How to Blur a Background in Lightroom Step by Step Guide Design Shack
Blurring the Background Using Lightroom's Brush Tool This is the third option for older versions of Lightroom without AI features. The Brush tool is used to apply an effect to a part of your image. The mask part of the brush panel lets you create a new mask or edit an existing one. Apple. For iPhone users, opening a picture in the Photos app, tapping Edit and moving the Sharpness slider may help a slightly blurred image. Adobe Lightroom and Google's Snapseed work similarly.
How to Blur Background in Lightroom in 6 Steps? Follow these 6 easy steps to make your portraits professionally blurred. Bring more focus to your subjects, add a timeless/dreamy style, and disguise unwanted objects in several clicks. To do it you need about 5 minutes. 1. Import Your Image A simple way to blur backgrounds in Lightroom Two Blooms 9.17K subscribers Subscribe 55 Share 11K views 1 year ago In this short & sweet Lightroom tutorial, you'll learn how to add blur to. 
Bokeh Blur Dark Lightroom Background Free Stock Image
Masking tool in Lightroom Blurring the background Once the mask has been set, you will need to invert the selection (seen in red). The original selection will be our subject, inverting the mask (there is a little tick box) will swap the mask to our background. Invert the mask selection to get the background Suggested Read: 7 Tips For Selecting The Perfect Background. 1. Import Your Photo Into Lightroom And Prepare The Image. Because this process requires specific areas of the photo to be worked on that change from one to the next, background blur in Lightroom must be applied to individual photos.